Showing posts with label Cooking. Show all posts

Tuesday, August 7, 2012

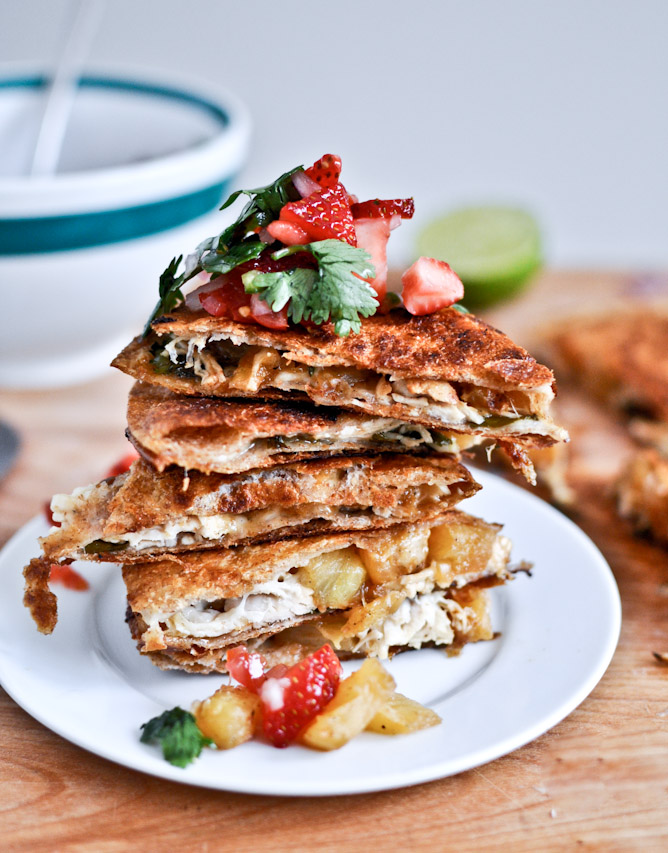
Caramelized Pineapple Chicken Quesadilla with Spicy Strawberry Salsa


Photo by how Sweet it is.
Seriously, how does one come across a beauty like this and NOT continue to pass on to my fellow foodies? I am one of those people that LOVES food, yet suffers from chronic severe nausea, how unfair is THAT?! Being that I deal with that constant battle, when I find something that actually sounds good and that I can eat, I get beyond excited! I came across this recipe today done by the people over at how Sweet it is and just needed to pass it on to you! It is a delicious mix of spicy and sweet, and we could all use a little bit of both in our lives. Try it for yourself and come back to let us know how your's turned out! I think that the only swap out I would make would be parsley for the cilantro. I have never been able to stomach cilantro very well, so it is a normal "swap" for me.
Caramelized Pineapple Quesadillas
serves 2
2 cups fresh pineapple chunks, cut into squares
3 tablespoons coconut oil
1/8 teaspoon salt
1/8 teaspoon cinnamon
1/2 vidalia onion, diced
1 small poblano pepper, seeded and diced
1 boneless, skinless grilled chicken breast, shredded
6 ounces monterey jack cheese, freshly grated
1/2 cup freshly torn cilantro
Heat a large skillet over medium heat and add 1 tablespoon of coconut oil. Add pineapple and toss with salt and cinnamon, cooking until caramelized and golden, flipping occasionally – about 6-8 minutes. Remove pineapple and place in a bowl, then add another 1/2 teaspoon of coconut oil, tossing in onions and peppers with a pinch of salt. Stir and cook until softened, about 3-5 minutes, then remove from the skillet and place in the bowl with the pineapple.
Reduce the heat in the skillet to low, add another 1/2 tablespoons of coconut oil. Place a tortilla down, then cover in a sprinkling of cheese (make sure you leave enough for the second quesadilla), chicken, the pineapple, onions and peppers, and cilantro, then add another sprinkle of cheese. Cook until tortilla is golden, then gently flip, keeping the ingredients inside, and cook until other side is golden. Repeat with remaining quesadilla, and serve with strawberry salsa.
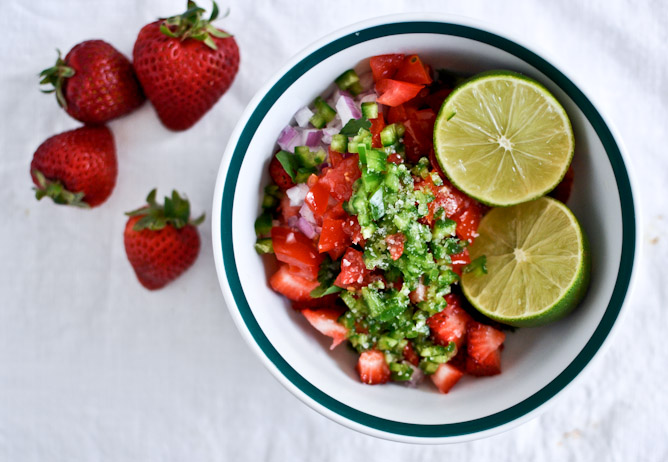
Photo by how Sweet it is.
Spicy Strawberry Salsa
1 medium tomato, chopped
3/4 cup chopped strawberries
1/4 red onion, finely diced
1/2 jalapeno, seeded and diced
1/3 cup freshly torn cilantro
1 lime, juiced
1/4 teaspoon salt
1/4 teaspoon pepper
Combine all ingredients together in a bowl and mix thoroughly. The longer it sits, the more flavor that develops. Keeps well in the fridge for 2-3 days.

Wednesday, July 18, 2012

Summer Chili for a Raining Day

 
It has been raining all morning here and the gloom is getting to me, makes me want to cook… I’m in a bit of a predicament though, because the Lemur King is sleeping and I can’t go out to shop for the needed ingredients. When I am finally able to go shopping though, you can bet that I am going to pick up the things needed for a summer chili. I have been craving it lately and had to go on a hunt of sorts this morning to find a good recipe. The chili gods answered me though because I came across this beautiful recipe over at The Smith Scoop and couldn’t contain myself! It had to be shared… She even has this amazing little trick with a pie plate and grease that was SO simple, yet made SO much sense! So click on the photo and go check it out!

Tuesday, June 12, 2012

My Nachos


I have been noticing a pattern lately in my eating habits... It is a Mexican kick again. I swear, sometimes I could eat the same foods for a month straight, then all of a sudden, I can't take another bite of "it" for six months! Today I decided to throw myself together some black bean nachos while I was making the Lemur King his foods. Snagging a bit of the black beans and rice, those were the first to go on the tortilla chips... I ended up throwing on some tomatoes that needed to be used up, a little green onion, and cheese of course. Went out of my way to bake them in the oven to spoil myself a bit. Just threw them on 350 degrees just until the cheese melts. For myself, I tend to go a bit overboard here, baking until all edges are brown and crispy. Once cheese is melted, carefully throw onto a plate, add Ortega Medium sauce, and sour cream Full of awesomeness...

Friday, March 9, 2012

Gluten-Free Banana Bread Pancakes

(Photo courtesy of My New Roots)
I am having the hardest time adjusting to any type of shift in my normal daily food habits. I know it's selfish and it may not be the best thing for me, but I just love food WAY too much! Shame on me that I use the fact that I am in shape to do as I please when it comes to eating. Though I have noticed lately that my skin is getting that "sag" to it. What the heck is that?! I am not even 40 yet! Maybe if I keep finding things this yummy looking to eat then the transition won't be so hard on me? Please check out these Gluten-free Banana Bread Pancakes from My New Roots, they are just awesome over there!

Wednesday, February 22, 2012

Hot Dog Wraps- Take 1

So, I almost panicked when Spyder said he wanted hot dogs! I remained calm and chose to spice them up a little bit so that I could stomach the thought. We decided to wrap them in Pillsbury Biscuits! I added a half slice of “cheese” to mine. My oven bakes quite high, so I was baking them at 325 degrees until golden brown. I didn’t want to run the risk of the outside burning and the biscuit dough not being done, or the hot dog being cold, on the inside. We serve our’s up with a side of ketchup and spicy mustard around here. Perfect snack for a cold afternoon!

Monkey Bread Leftovers

So, this evening Spyder had asked for hot dogs for dinner. We very rarely have hot dogs, so there were no buns in the house. I had decided to spruce up our dogs by wrapping them in Pillsbury Biscuits. As much as I hate to admit it, serve with a side of ketchup and spicy mustard, they turned out pretty good! There is a forever mental struggle whenever I am dealing with hot dogs, but these were darn tasty! That being said, we only used a couple biscuits for dinner so I had to think of something on the fly...


I decided on Monkey Bread. This recipe is so simple and I honestly change it up each time I make it. Being that I was not working with a full can of biscuits, I decided to skip using a pan to cook it in and decided on a 2 c Mason jar instead. 


First I cut the biscuits into bite-size pieces and tossed them into a bowl of cinnamon and sugar to coat.

Next, toss all yummy coated pieces into greased jar. I cheated and used cooking spray.


Once almost to the top (they need room to grow), you could probably skip this step, but I added a big spoonful of butter and a dash of organic Vanilla Extract. mmmm

Then into the pre-heated oven at 325 degrees...


 until it looks like this....

I want to say that it took close to 20 mins., but honestly, my oven is extremely funky and I kind of guesstimate everything. Please feel free to ask any questions! 


Sunday, February 19, 2012

Avocado Quesadillas

Avo-dilla
vegan, makes 4 triangles

1 wrap or tortilla (if using extra large lavash bread, you may need to slice in half - and have a more square shape rather than a half-circle)
1/2 ripe avocado, sliced
1-2 tsp vegan butter (Earth Balance)
1-2 tsp maple or agave syrup
pinch of seasoned salt
additional spices for inside or outside of the wrap - optional
Directions:
1. Melt the vegan butter in a very hot skillet.
2. Add the tortilla. Toss it around in the melted butter a bit to wet all sides.
3. Lay "butter-tossed" tortilla flat in the pan and quickly add the avocado. Mash the avocado a bit into the tortilla and fold over one side - just as you would a quesadilla. Note: you can also sear the avocado a bit in the hot pan if you'd like a warmer - softer avocado filling texture.
4. Drizzle the maple syrup over top the hot tortilla and wait for the sizzling to begin. The maple syrup will caramelize with the butter to brown the edges of the wrap.
5. Carefully flip the tortilla so that both sides brown. If a few ago slices spill out, just open the wrap and slide them back in. And if you really want, you can add some Daiya cheese to make the tortilla stick together (not needed for flavor though!) The heating process is pretty fast - just a few minutes from start to finish.
6. Remove skillet from heat or transfer avo-dilla to plate to cool.
7. Slice and serve warm! Yummy with hot sauce. You can also add more spices over top the warm ago-dilla to flavor a bit.
Enjoy!

Friday, February 10, 2012

Homemade Black Bean Nachos


I have been noticing a pattern lately in my eating habits... It is a Mexican kick again. I swear, sometimes I could eat the same foods for a month straight, then all of a sudden, I can't take another bite of "it" for six months! Today I decided to throw myself together some black bean nachos while I was making the Lemur King his foods. Snagging a bit of the black beans and rice, those were the first to go on the tortilla chips... I ended up throwing on some tomatoes that needed to be used up, a little green onion, and cheese of course. Went out of my way to bake them in the oven to spoil myself a bit. Just threw them on 350 degrees just until the cheese melts. For myself, I tend to go a bit overboard here, baking until all edges are brown and crispy. Once cheese is melted, carefully throw onto a plate, add Ortega Medium sauce, and sour cream Full of awesomeness...